The introduction of SwiftUI at WWDC 2019 was a dramatic shift in the way that applications are built in the Apple ecosystem. Moving from an imperative programming model to a declarative one means that the old architecture patterns that we know and love may no longer make sense. However, Apple has not committed to any singular pattern, unlike their MVC recommendation for UIKit, but they do provide a set of tools for passing data between views.
The declarative nature of SwiftUI means that the code will describe the structure of the UI based on a given state and, as the state is updated, the views will all change to reflect these modifications.
The challenge that arises from this change is deciding how to pass data to different views, and how to report changes made to that data back to the source of truth.
Passing Data
Immutable Data
Some views need to be simple representations of the data that is passed to them, so the view should not be able to make any changes to that data. Creating a view with an immutable state is as simple as passing the data in via an initializer.
For example, let’s say that we have a view that shows progress between 0.0 and 1.0 in a progress view and a label underneath.
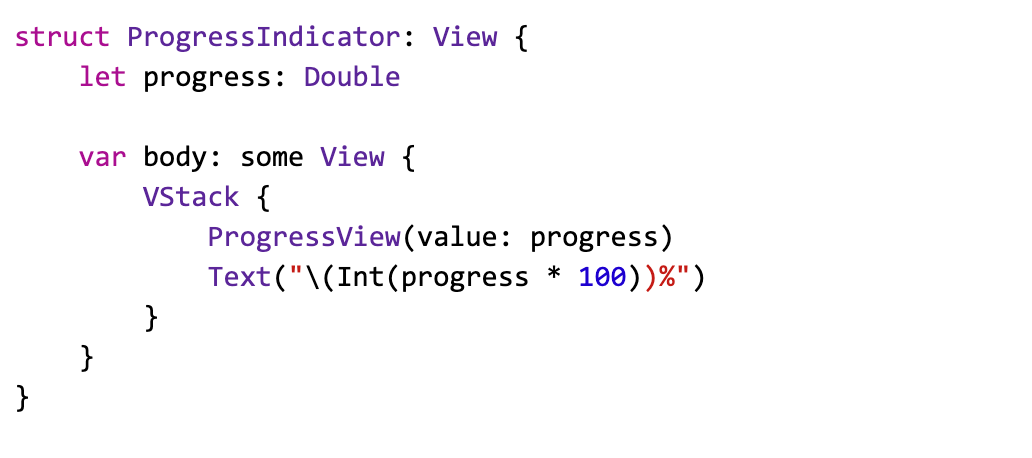
This view takes in a single parameter that determines how much of the progress view to fill in and what to display in the label. ProgressIndicator has no way of updating progress. When the parent updates its progress value, the initializer of ProgressIndicator will be called and re-rendered accordingly.
An important note here is that initializing a View struct does not mean that a new underlying view is created, which seems slightly counterintuitive. You may think that initializing a new value is going to create an entire new view and replace the previous one but keep in mind that because of the declarative nature of SwiftUI, we are only describing how the views should be presented. The SwiftUI framework decides how and when the underlying views will be rendered and calling an initializer may or may not cause a re-render.
Mutable Data
There are times when you want a view to have read/write access to a value, but not necessarily own that value. SwiftUI provides a property wrapper, @Binding, that allows a two-way connection between a stored value and the view that displays and changes that data. Binding is not intended to be used as the source of truth; instead it is used for mutating data that is stored in a different view as a source of truth. For example, say we wanted a view with a button that toggles a value between true and false. That view should not own the Boolean flag, but instead should mutate the value owned somewhere else.
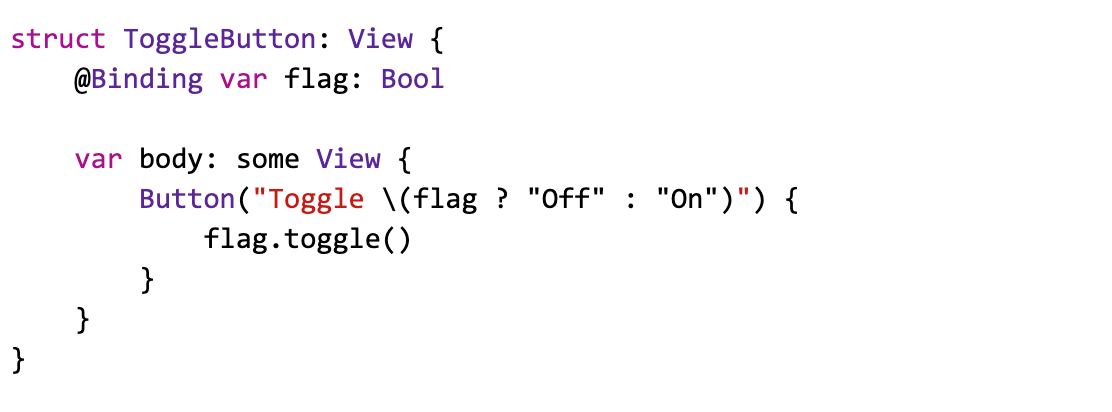
Having a property with the @Binding property wrapper creates an initializer that requires a Binding<Bool> parameter. Now, whenever the source of truth updates, its flag value the ToggleButton view will update and whenever the ToggleButton is pressed, it will update the flag value and notify the source of truth.
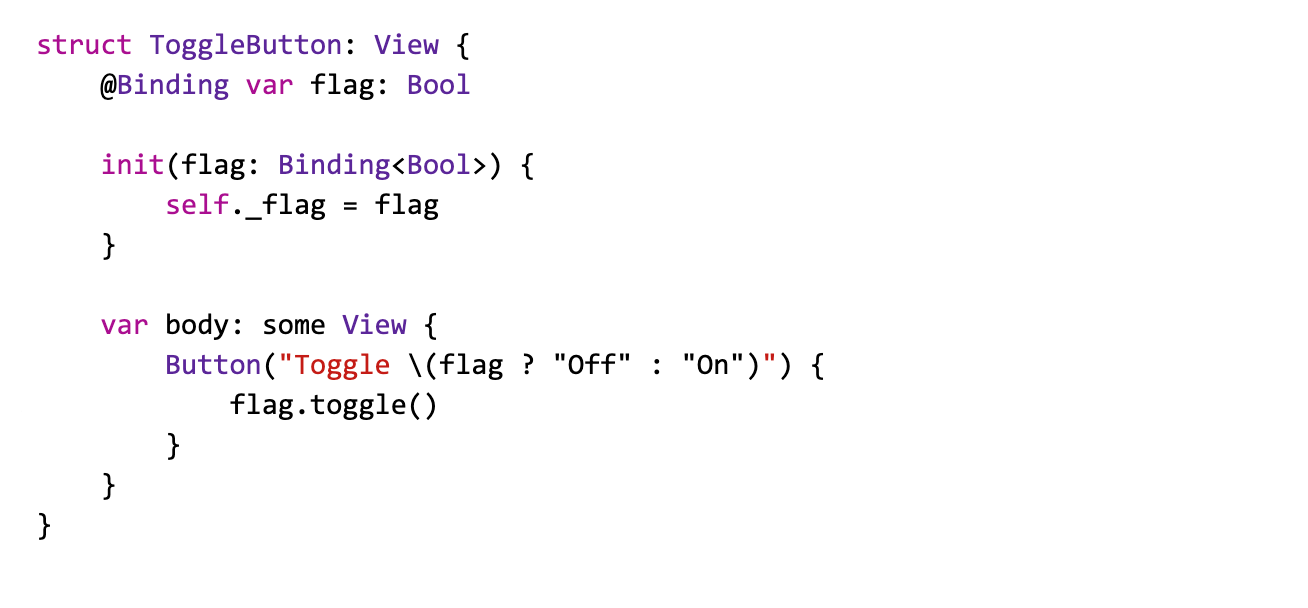
If we needed to create our own custom initializer we can pass in a Binding<Bool> and assign it to the underlying Binding. For Swift property wrappers we access the underlying type by prefixing the variable name with an underscore.
View State
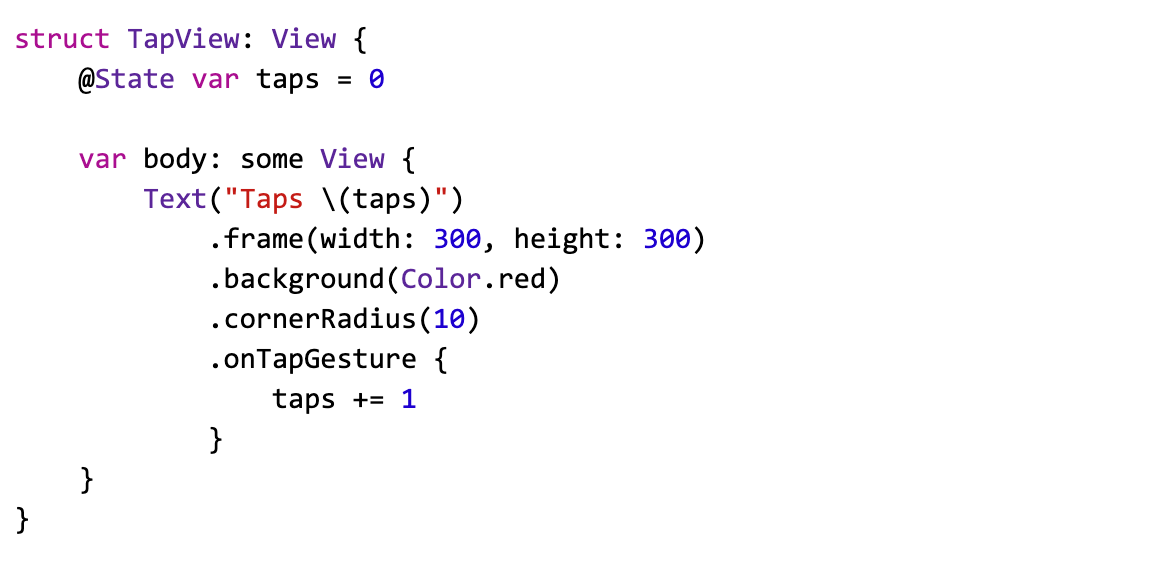
Some views will want to have a state that is unique to that view. Since the state is what determines what information is displayed to the user, updates to a view’s state may come from user interaction, a network request, or even just a simple timer. The view wants to have ownership of its state so that it can know when to re-render and who to send data changes to. SwiftUI’s @State property wrapper gives the capability to store values in a value and automatically re-render when the value changes. For example, if we have a view that needs to keep track of how many times the user has tapped the screen we can do the following:
Source of Truth
We’ve done a lot of talk about the “source of truth”. A source of truth is a store of information that is universal to the application. This could be a local database, a cache of records stored from a server request, or just a JSON file loaded locally. The idea behind a source of truth is that if you update a value in one part of the application it should persist throughout the rest of the application, that way all data is always up to date and consistent. SwiftUI provides a few ways to inject this source of truth into your views.
The ObservableObject protocol allows you to create a data provider that notifies its view when updates have been made. This may take the form of a view model, a network service, or any other data abstraction and there are several different ways to inject your ObservableObject into your view. An ObservableObject is a good place to put your business logic. Through doing so you can keep your data model independent from your views, and have finer grained control over where and when your processing takes place.
@ObservedObject
The @ObservedObject property wrapped the simplest way of injecting an ObservableObject into your view. The ObservedObject will exist for the lifetime of the struct and as soon as a new struct is initialized for that view, the ObservableObject will be re-initialized. For example, imagine a login screen where you have a view model that keeps track of the username and password inputs for a login form.
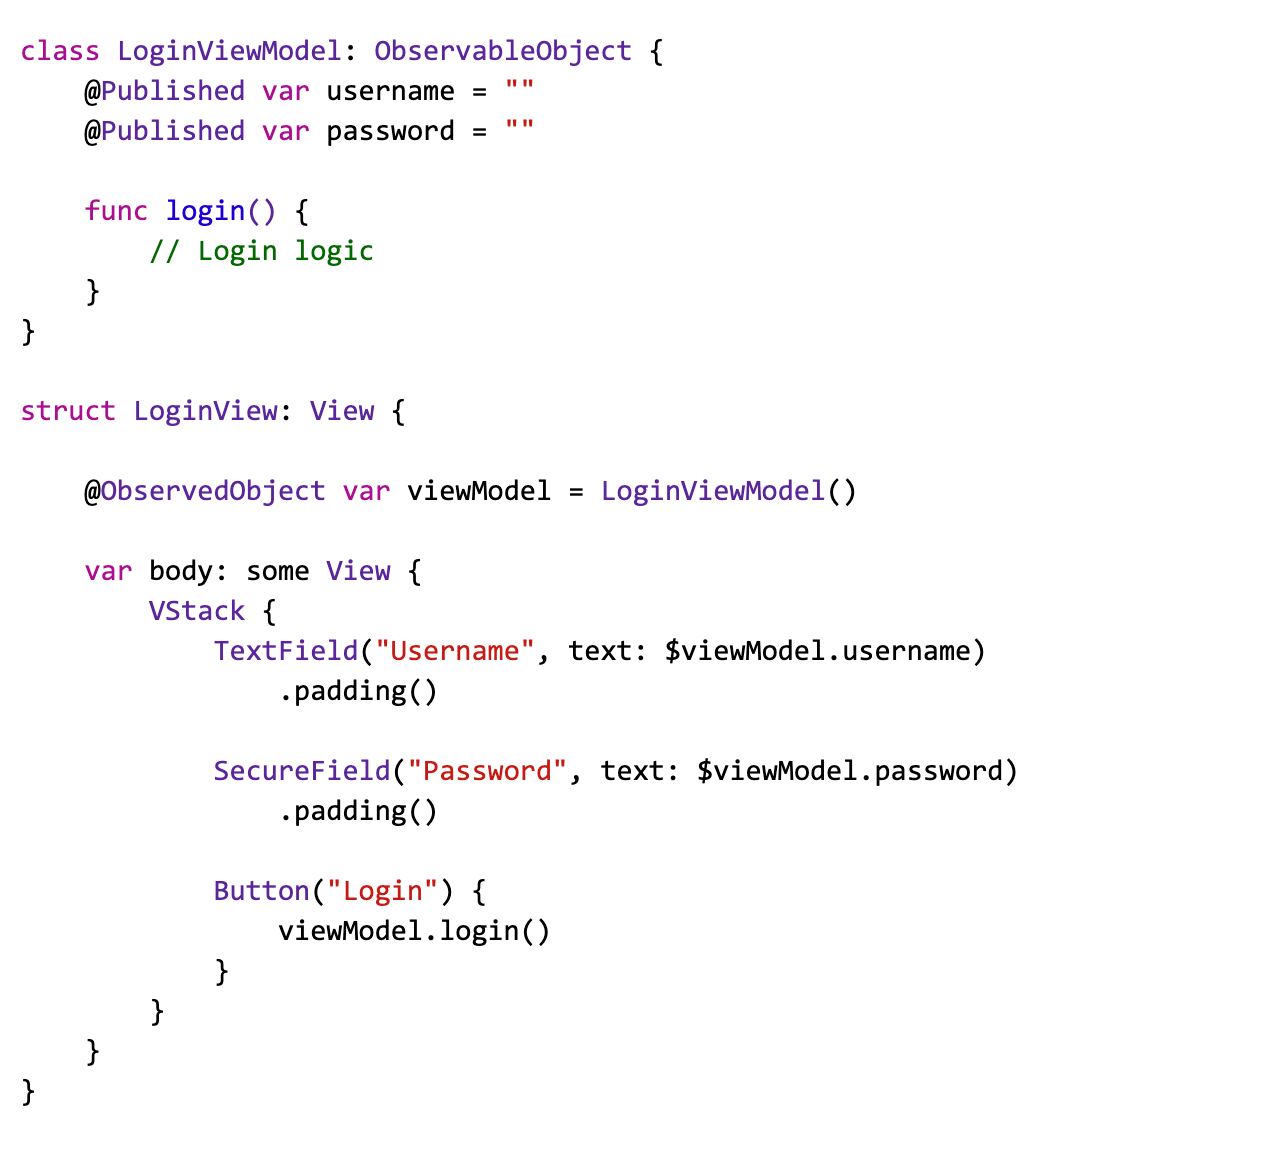
A few things to note here. First, notice how in the LoginViewModel we use the @Published property wrapper on the username and password properties. This tells the ObservableObject to broadcast that a change has been made whenever either of these properties are mutated. Second, see how we use the $ prefix for view model in the LoginView. That allows us to use the view model as a Binding and, thanks to the power of Swift dynamic member lookup, the compiler knows what properties LoginViewModel has and can provide direct Bindings to each of them.
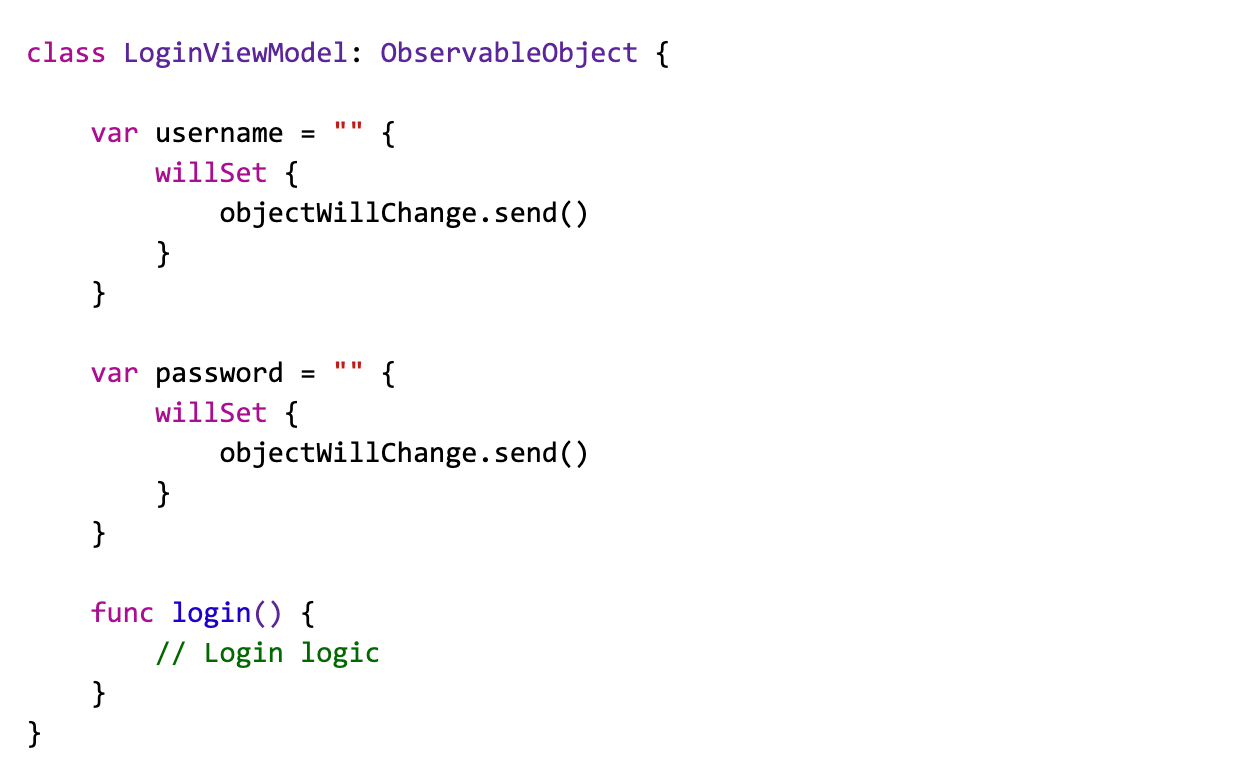
By conforming to ObservableObject Swift automatically gives you an objectWillChange property. objectWillChange is a Combine Publisher that sends updates when changes are about to be made. It is important to note that this publisher should be called before changes are made, so that SwiftUI has time to prepare for the changes. What @Published is doing behind the scenes is calling objectWillChange.send() to notify the view that changes are about to be made. We can do this manually if we choose.
LoginViewModel acts as our source of truth. We can have two way bindings between our view and source of truth. LoginView should never be re-initialized based on updates to username and password, so we do not have to worry about LoginViewModel being re-initialized.
@StateObject
Looking at this view we see that it could also be used to allow the user to register. After a little refactor we can adjust the button label and action based whether the view is initialized as a login view or a registration view.
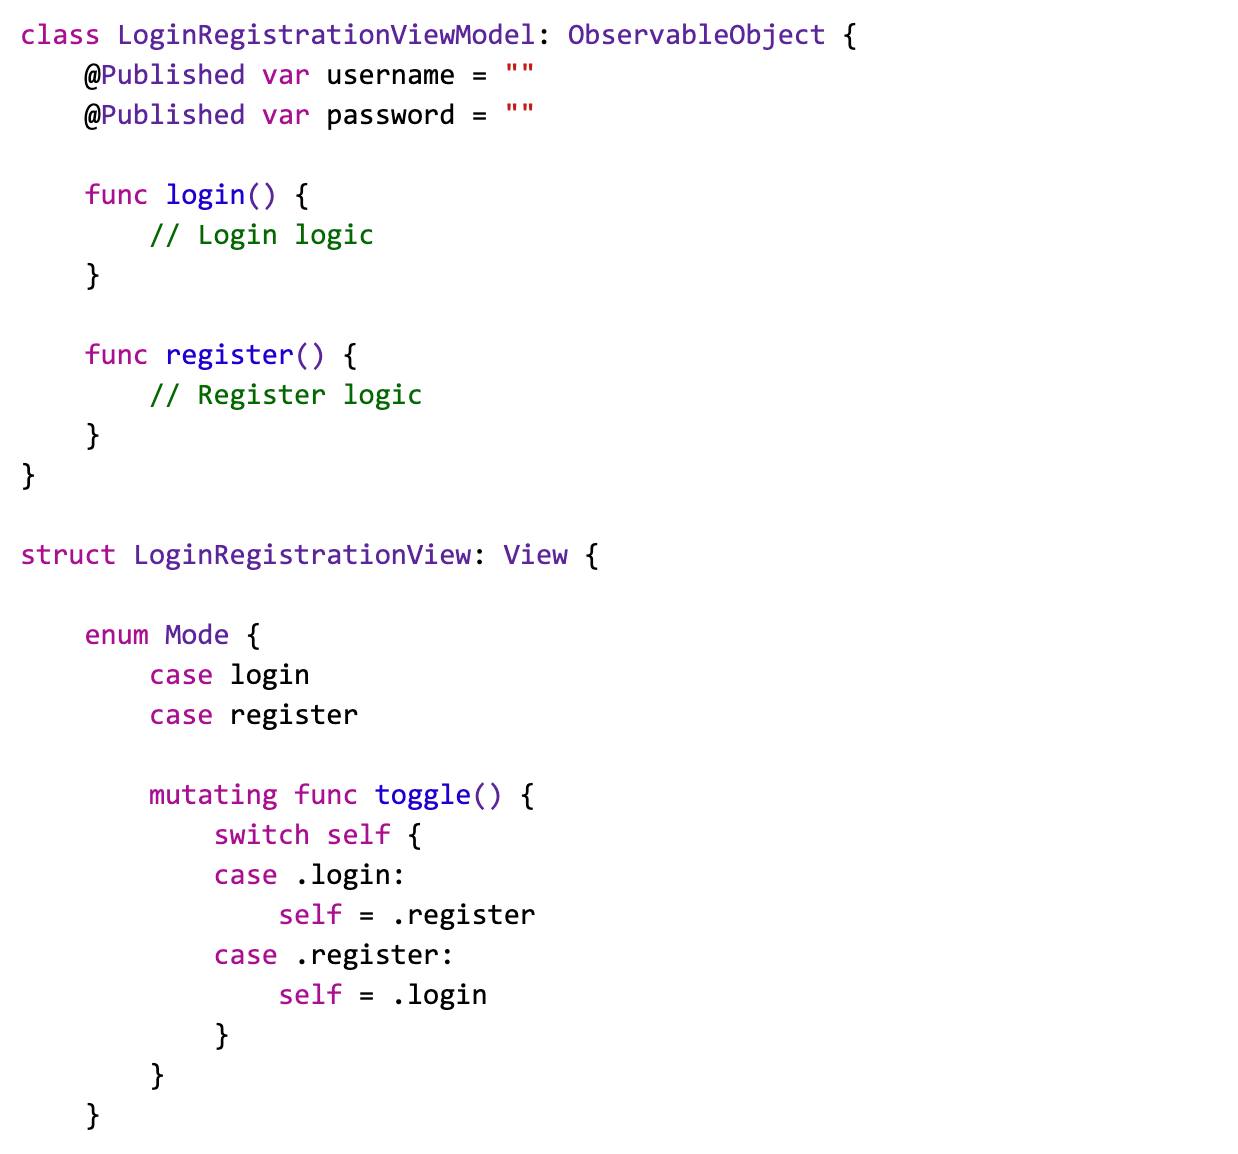

This is great until the user enters her username and password and then realizes that she is on registration and not login. She selects a button in LoginRegistrationView’s parent that toggles between registration and login, and the username and password fields are cleared out. When the loginMode state is changed in the LandingScreen view it reinitializes the LoginRegistrationView which in turn creates a new LoginRegistrationViewModel with empty username and password properties.
This is where @StateObject comes in. StateObject is nearly identical to ObservableObject with the exception that it stays alive as long as the view, not the struct. All we have to do is swap out @ObservableObject with @StateObject.
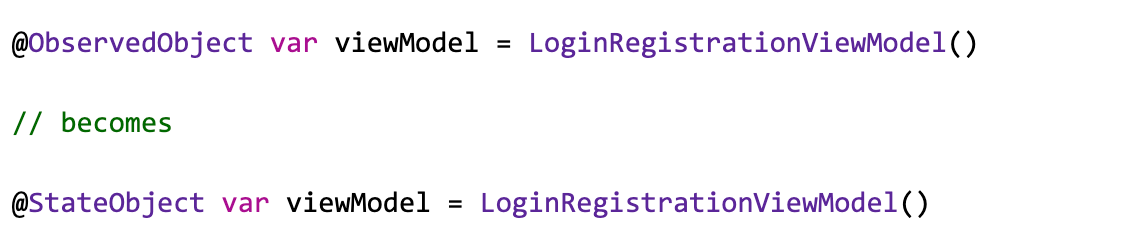
Now, no matter how many times we update loginMode, the view model will persist. We no longer have to worry about losing the state of the username or password. StateObject is useful when you need the data to persist for the lifetime of the view.
@EnvironmentObject
ObservedObject and StateObject work well for injecting dependencies into a single view, however there will be times that we want to use the same object across the entire application. For example, we may need to have an object that connects to a local database, or a network service that caches responses that can be reused in other views with repeating a network request. The remedy for this situation is the @EnvironmentObject property wrapper. EnvironmentObject allows us to inject any object that implements the ObservableObject protocol into our root view, and makes it available in all subsequent subviews or subsequent views in the navigation stack.
Let’s continue with our login example, and have three main components: a UserService for handling network calls and caching, a LoginView for the input form, and a WelcomeView for after the user has logged in.
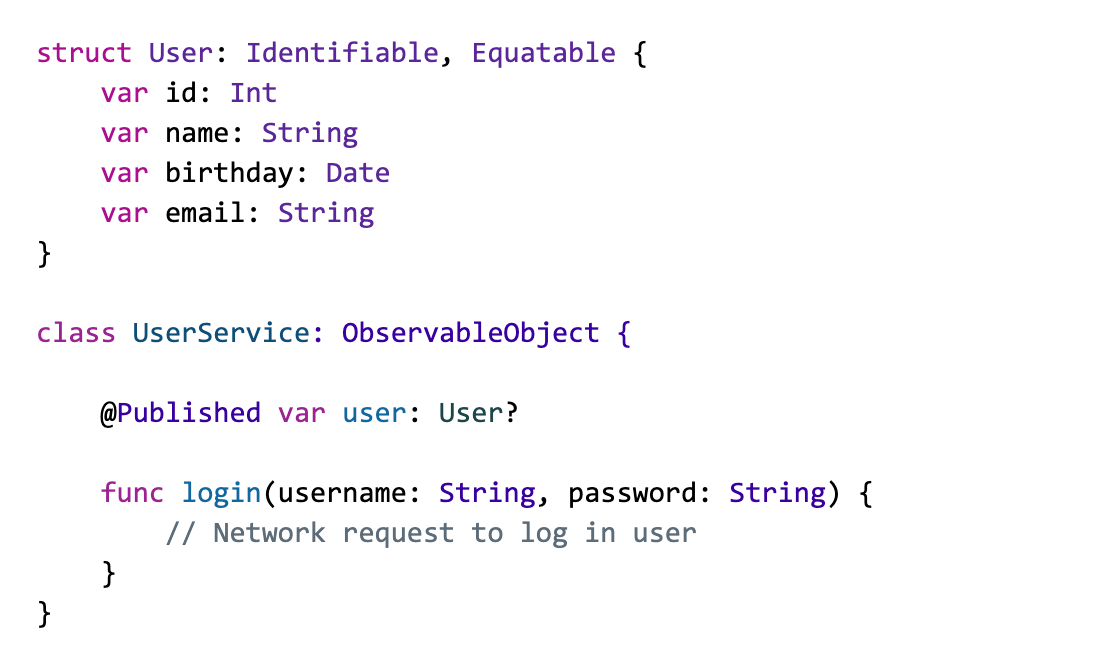
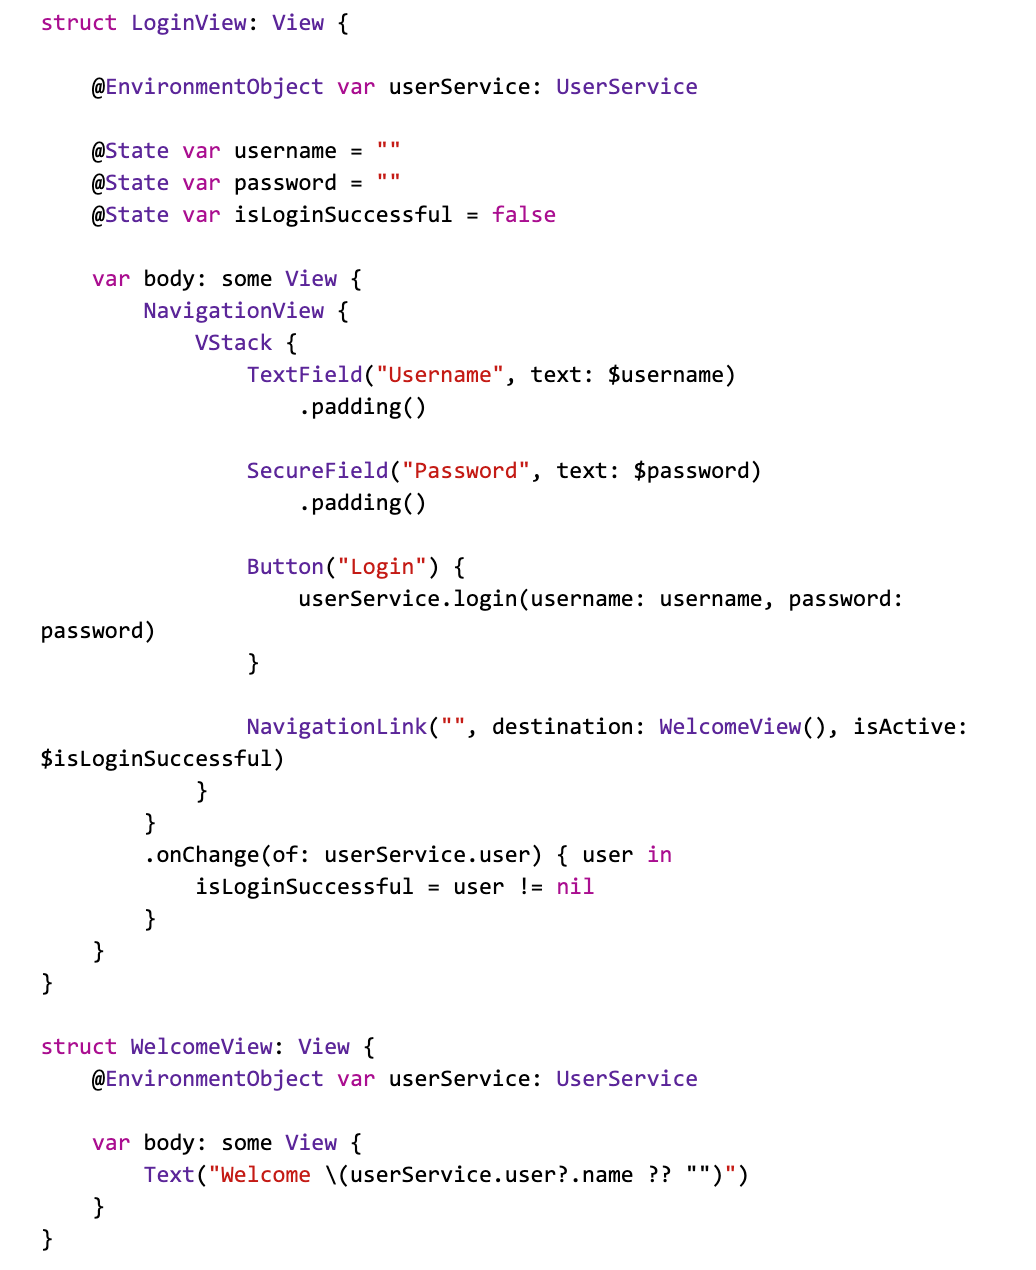
Here you can see that both LoginView and WelcomeView have a line for pulling in an instance of UserService. As this stands the program will compile but it will crash on runtime. That is because we have not given the application an instance of UserService to pull into each view. To accomplish this we must go into the main piece of the application and provide a UserService object.
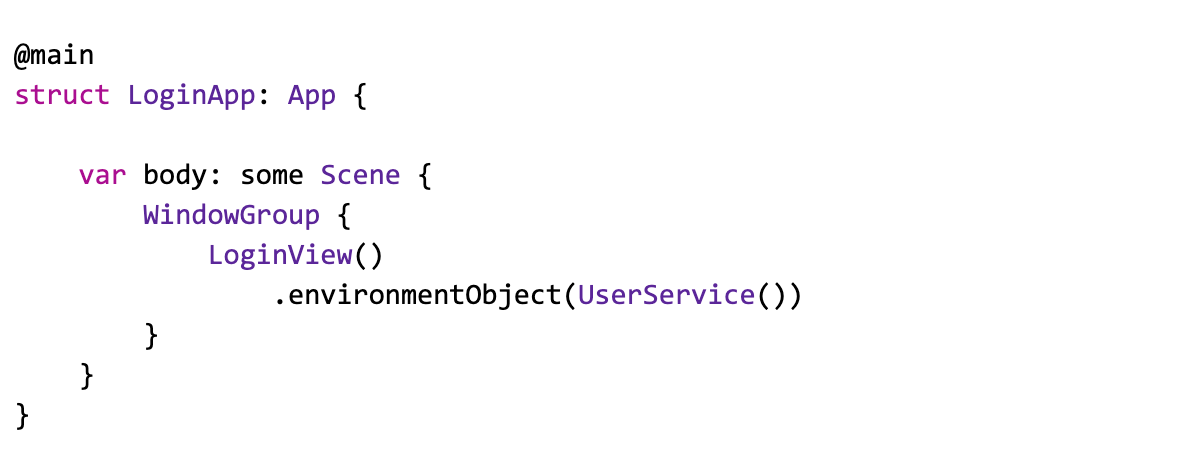
Now when we run the application it will inject a UserService into the root view, and as we add subsequent views to the stack the UserService instance will be passed along behind the scenes. Our LoginView uses the user service to attempt a login with the given username and password. The view also listens for changes to the services User property via the new onChange modifier for Views. When the user is logged in the user property will no longer be nil, so we can push to the next view. WelcomeView pulls in the same instance of UserService used in LoginView. Therefore, we will have the same cached User, and can display that information to the user.
EnvironmentObject gives us the capability to inject a single instance of an object into the entire application. This avoids the need to create singleton objects or manually pass objects through the views, and while there may be some cases where you will want to have a global object throughout your application, EnvironmentObject will probably be used sparingly for objects that store some sort of global state.
Optimizations
We have covered how to pass data to and from our views, but how do we optimize these updates for the best performance. Every time a @State property or ObservableObject is updated the view will re-render. To ensure that the user gets the best user experience possible we want to minimize the number of re-renders that occur.
Avoid Slow Initialization
Each re-render will reinitialize the structs that represent the different views. If there is a lot of logic inside of these initializers it will increase the rendering time. Keeping your initializers small will ensure that there are very few computations done and that the view can be rendered as soon as possible. Other computations can be done once the view has appeared and then updated accordingly.
Keep Your Body Pure
Each SwiftUI view has a computed body property that is called every time that view is re-rendered. This property should always be a pure result of the current state of the application. Allowing side-effects or extended computations in this computed property will cause slower rendering. It is best to keep your views as a function of the state provided to the view from a @State, @Binding, or ObservableObject.
Consider a Single App-Wide Source of Truth
The source of truth for your application may be a single database, a JSON file, or a series of different cached network requests. To avoid updates coming from different sources it is recommended to have a single source of truth to draw from. This reduces complexity by keeping all of the application state in a single place. Network requests, database calls, and user interactions will make mutations to this state and the system will broadcast those changes accordingly.
Summary
SwiftUI has fundamentally changed the way that applications are architected in the Apple ecosystem. Data flow from one view to another is now done through bindings and stateful properties. State management is fundamental to creating efficient applications that keep information relevant and up to date for the user. Understanding how to properly handle local and universal state is crucial to the SwiftUI experience.
A playground demonstrating the samples presented above is available here. Xcode 12 (in beta) is required to run this playground due to support for @StateObject.